Preparing Jars for Homemade Preserves: Start with the Basics 🫙
When making jams, fruit preserves, tomato passata, sauces, or other homemade preserves, preparing the containers properly is an important part of the process.
The first rule is simple: jars must be perfectly clean and free from cracks or chips. Lids, caps, and seals should also be intact and suitable for the containers you are using.
Preparing the jar correctly, however, is only one part of the process. Different preserves have different requirements and should be prepared, filled, and processed according to the appropriate instructions.
You do not necessarily need complicated equipment to prepare the containers, but it is important to work carefully and follow a procedure suitable for the type of preserve you are making.
Instructions
1. Check and Wash the Jars and Lids 🫙
Before you begin, check the jars one by one.
They must be completely intact, with no cracks, chips, or damaged rims. Check the lids as well: they should be intact, undamaged, and suitable for the containers you are using. If your closure system uses single-use caps or seals, always use new ones.
Wash the jars and lids thoroughly with hot water and dishwashing liquid, making sure to remove any residue.
Keep the work surface and any utensils used during preparation clean as well.
2. Prepare the Jars Before Use 🫙
Follow the appropriate instructions for the type of jar and the preserve you are making. Treating containers in boiling water is a common method used at home, but this should not be confused with the heat processing of the preserve after the jars have been filled.
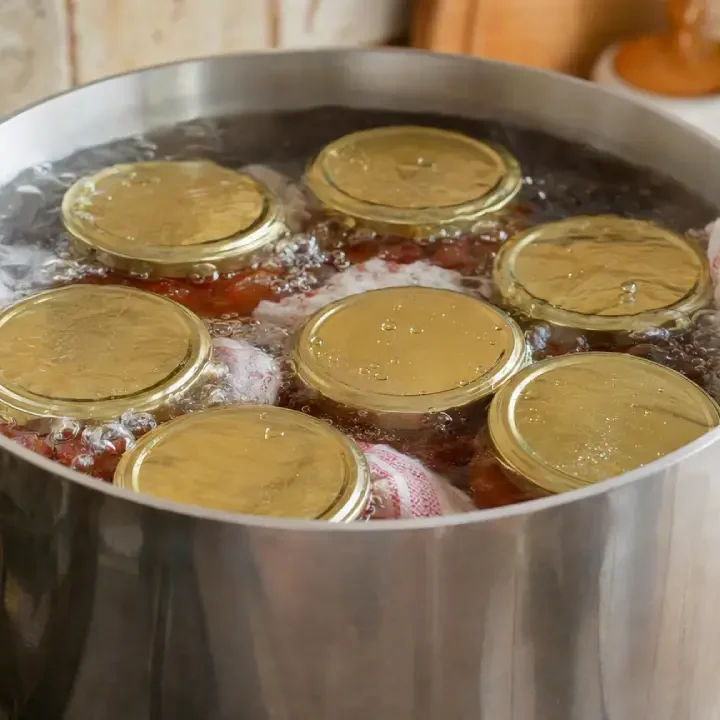
If you are using a large pot, protect the jars from direct contact with the bottom of the pot and with each other by using a clean kitchen towel, then immerse them in the water according to the procedure you are following.
After treatment, handle the containers with clean utensils, avoid touching the inside, and use them according to the instructions for the specific preserve.
It is important to remember that there is no single treatment for empty jars that can make every type of homemade preserve safe. Safety depends on the entire process and on the characteristics of the food being preserved.
3. Fill the Jars Correctly 🍓
Once the preserve is ready, it is time to fill the jars.
Always follow the recipe instructions for how and at what temperature the preserve should be put into the jars. Use a reliable recipe specifically developed for that type of preserve: filling temperature, headspace, any required acidification, and subsequent processing are not interchangeable between different preparations.
Never fill the jar all the way to the top. Leave the headspace specified in the recipe, which is also important for any subsequent heat processing.
Before closing the container, check the rim carefully. If any jam, sauce, or other food remains on it, clean it thoroughly.
Close the jar using the appropriate closure system and follow the container manufacturer’s instructions.
4. Process the Preserve as Required 🔥
This is where an important distinction needs to be made: not all preserves require the same process.
Jams and fruit preserves, tomato preserves, sauces, and preserved vegetables cannot all be processed in the same way. Vegetables preserved in oil require particular care: oil alone does not make the food safe.
If the recipe requires pasteurisation of the filled and closed jars, follow the method and processing time specified for that particular preserve. There is no single processing time that applies to every type of preserve.
Do not arbitrarily change the proportions of ingredients such as vinegar, salt, sugar, or water. In some preserves, these ingredients do more than affect flavour: they also help create the conditions required for proper preservation.
5. Check the Vacuum Seal 👆
Once the jars have cooled completely, check the closure carefully.
With common metal lids, the centre should appear slightly concave and should not make the characteristic “click-clack” sound when pressed. If the lid is raised and moves when pressed, the container has not formed or maintained a proper vacuum seal.
Also check for leaks, food escaping from the jar, bulging lids, or unusual bubbles.
If a jar has lost its vacuum seal or shows signs of alteration, do not taste or consume the contents.
Remember, however, that a vacuum seal alone does not guarantee that a preserve is microbiologically safe. It is only one of the checks to perform: safety depends on the entire preparation and preservation process.
6. Label and Store the Jars 🏠
Once the jars are ready and properly closed, clean any residue from the outside.
Label each jar with the name of the preserve and the preparation date. Including the date makes it easier to identify when the preserve was made and to manage its storage time correctly.
Store the jars according to the instructions for the specific preserve, generally in conditions appropriate for that preparation and away from heat sources and direct light.
Before consuming a preserve, check the container and vacuum seal again.
Note
A Few Tips to Keep in Mind 💡
Not all preserves are the same.
Jams and fruit preserves, tomato preserves, sauces, and vegetables preserved in oil require different procedures. It is therefore important to follow a reliable recipe specifically developed for that type of preserve, without arbitrarily changing ingredients, proportions, or processing times.
Preparing the jars correctly is important, but it cannot compensate for an unsuitable preservation process.
A Note About Vegetables Preserved in Oil 🫒
Simply covering vegetables with oil and closing the jar is not enough.
Oil alone does not make a vegetable preserve microbiologically safe. These preparations require specific procedures, which may include appropriate acidification of the food and the processing method specified by the recipe.
For vegetables preserved in oil, always follow reliable and specific instructions rather than improvising quantities of vinegar, processing times, or methods.
What If the Jar Doesn’t Seal?
If the lid has not formed or maintained a proper vacuum seal, do not automatically consider the jar suitable for storage at room temperature.
If a preserve has lost its vacuum seal or shows bulging, leakage, unusual gas production, or obvious changes in appearance or smell, do not taste or consume it.
The absence of obvious signs of spoilage does not replace a correct preparation and preservation procedure.
One Last Important Thing
A vacuum seal is useful for checking that the container has closed correctly, but it is not, by itself, a guarantee of safety.
The safety of a homemade preserve depends on the entire process: the choice and proportions of ingredients, any required acidification, preparation, filling, heat processing, and storage conditions.
For this reason, always follow reliable recipes and procedures when making homemade preserves, without arbitrarily changing ingredients, proportions, acidity, or processing times.
Further Information
For detailed information on preparing homemade preserves and preventing botulism, consult the Italian Guidelines for the Safe Preparation of Homemade Preserves published by the Istituto Superiore di Sanità (ISS), Italy’s National Institute of Health, through its National Reference Centre for Botulism and in collaboration with the Italian Ministry of Health and other scientific institutions.